I recently got into 3D printing (for realsies this time) and had the inkling to try making a few timelapses
of the parts I was printing, as part of my upcoming NAS case. I had already set up OctoPrint, a remote web interface
for my 3D printer that runs on an external device, which in my case was a Raspberry Pi 3B. I was partly inspired to do
this project by this beautiful timelapse created by Jeff Geerling in his blog post on Octolapse:
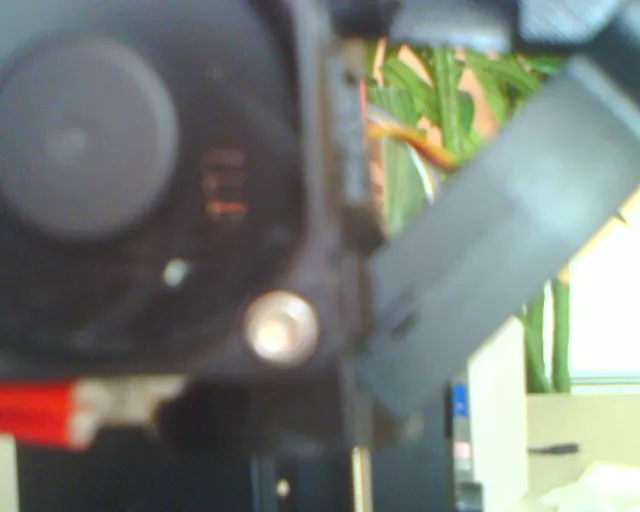
My first attempt to create a timelapse started with printing a z-axis mount to attach to my Prusa MK3S+ printer.
I dug through our boxes of old wires and electronics, and found an ancient webcam from 2009! It boasted 2 big and
beautiful megapixels, with a maximum resolution of 1600x1200! Amazing! As I expected, the quality was pretty dogshit.
Despite this, I still decided to try running a timelapse using the built-in timelapse functionality in OctoPrint.
After having configured the webcam within OctoPrint (available as a physical /dev/videoN device through the
video4linux driver), I enabled timelapses, and let a few print jobs go. While the result was, unsurprisingly, completely
unusable, there were a few major things I learned from this attempt:
Mounting a timelapse camera onto the z-axis (so that it will move with the printer) was not a good idea.
While this might be useful for a live video feed to check up on a running print job, this would make for a very
boring timelapse as you would only ever get to see the side of the printed object.
Consistent lighting would be crucial to make a good timelapse. Even if I was only printing during the day, the
shadows still change throughout the day and are very noticeable even on a minute-to-minute basis. If the sun sets,
or goes behind a cloud, or a light is turned off, then my timelapse would be ruined.
And most importantly, I need a much better camera!
What’s more, is that I realized that the built-in timelapse functionality is lacking in some crucial features, mainly:
Centering: There was no way to move the extruder to one spot for each frame! This resulted in the extruder jumping
all over the entire print, making for a messy timelapse.
Capturing: This relied on a webcam streaming in video capture mode (not a single-shot, crisp, image!), which makes
live webcams particularly unsuitable for this task.
Fortunately, I already had access to a decent DSLR camera (borrowed from a family member that never used it).
Taking a few pictures with it confirmed that it would be perfectly suited for this, perhaps even overkill.
The rest of the challenge for this project from now on would be connecting it to Octolapse.
Lucky for me, Octolapse already provides multiple guides for connecting DSLR cameras:
I also went on a tangent trying to get a live video stream from the camera.
webcamize turned out to do this job well. But for the reasons I mentioned
earlier, a timelapse from a video stream would not be ideal for this, not to mention that the video stream was
limited to the resolution of the preview screen of the camera (much, much less than what the camera was capable of).
webcamize also consumed 70% of a core at all times while it was running (probably due to the video loopback adapter)
which was horrible. I abandoned this idea once I found about the official DSLR guides from Octolapse*
The main gist of connecting a DSLR to Octolapse is using gphoto2, a USB camera control utility, to capture images just
as if I were pressing the shutter button. Octolapse recommends to avoid immediately downloading images right after capture,
as the extra time spent waiting could result in plastic globs on the extruder, ruining the print. I took this advice
and made my setup download all images after the print has finished, but before rendering.
While the scripts provided in the 2nd official guide will work fine, they have one major drawback, that being that all images
must be wiped from the camera’s SD card in order for it to download the correct images. I tweaked it until I was able
to remove this requirement entirely, by storing the last taken image’s number and downloading all images with a number
higher than it after the print finishes.
~/octolapse-scripts/before-print-start.sh
1
#!/bin/bash
2
3
# IMPORTANT: This folder will likely vary for each camera.
4
# Run `gphoto --list-files` to determine the correct path for images.
5
6
CAMERA_FOLDER="/store_00020001/DCIM/100CANON"
7
8
9
# Put the arguments sent by Octolapse into variables for easy use
10
CAMERA_NAME=$1
11
12
set-oerrexit
13
set-onounset
14
set-opipefail
15
shopt-snullglob
16
17
echo"[-] Camera info:"
18
gphoto2--auto-detect--summary--storage-info
19
20
# IMPORTANT: The config keys and values set here may vary across different cameras.
21
# Run 'gphoto --list-all-config' to get all config keys and values.
22
23
echo"[+] Synchronizing time on camera"
24
echo"[+] Setting camera capture output to SD card"
After configuring Octolapse to invoke these scripts, my first attempt with this new camera setup turned out to be quite good!
After adjusting my camera settings a bit, and turning off:
Auto stabilization
Autofocus
Auto exposure
Auto flash compensation
This removed much of the visual artifacts from the previous timelapse, and made for a nearly perfect timelapse!
The lighting still seems to constantly change with each frame, but I don’t think I can improve upon this much, without
getting a bright studio light shining down onto my printer. Oh well, it is what it is.
However, my print bed still seems to be moving throughout the timelapse, which I wasn’t able to fix.
I assume this could be caused by mistimed snapshots happening before the bed finishes moving, or perhaps that my
printer is just super inaccurate. If this was a CoreXY printer, such that the print bed is fixed in place on the
x/y axes, then this issue wouldn’t exist. Either way, the timelapse is good enough for me, so I didn’t bother
investigating this further.
While testing, I encountered another issue I kept running into: the camera’s auto power-off functionality. While
I was able to manually turn this off in the camera’s settings, I was unable to automate this via gphoto2 for some
reason. This setting was marked as writable, but the camera refused commands to write to this settings.
This means that there would be no way to automatically turn off the camera once a print finishes. Unfortunate, but
ultimately not that big of an issue.
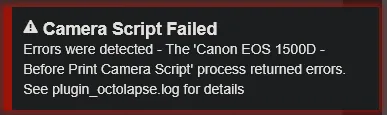
However, a bigger issue was when I forgot to turn the camera on! Starting a print job would spit out an
unhelpful error notification from Octolapse, providing no indication of the actual error:
After tinkering a bit more with the start script, I was able to automate sending a notification to the UI, using
another 3d party plugin (API Notifications) for OctoPrint. I was quite surprised to find that there was no
built-in API endpoint to create a notification, and that I needed a plugin to achieve this. Using the API
requires an application key to be provided to the script as well (Global API keys are deprecated and will be
removed in OctoPrint v2.x).
Here are the changes required to the ~/octolapse-scripts/before-print-start.sh script:
# Run `gphoto --list-files` to determine the correct path for images.
5
6
CAMERA_FOLDER="/store_00020001/DCIM/100CANON"
7
+OCTOPRINT_URL="http://localhost:5000"
8
+OCTOPRINT_API_KEY="<API_KEY>"
9
10
11
+# Check if any cameras are connected
12
+# If not, send an error notification to the OctoPrint UI via the OctoPrint-API-Notifications plugin
13
+if ! gphoto2 --auto-detect | grep -q '[0-9]'; then
14
+ echo "[!] No camera detected; sending notification"
15
+
16
+ curl -s -X POST "${OCTOPRINT_URL}/api/plugin/api_notifications" \
17
+ -H "Content-Type: application/json" \
18
+ -H "X-Api-Key: ${OCTOPRINT_API_KEY}" \
19
+ -d '{
20
+ "command": "notify",
21
+ "message": "No external camera was detected! Please check the USB connection and ensure that the camera is on!",
22
+ "title": "No camera detected!",
23
+ "type": "error",
24
+ "persist": true
25
+ }'
26
+fi
27
+
28
echo "[-] Camera info:"
29
gphoto2 --auto-detect --summary --storage-info
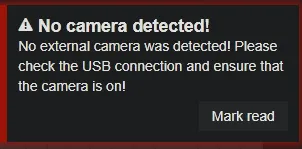
And here is how the final result looks like from the OctoPrint UI:
This setup allows for a much nicer user experience when I inevitably forget to turn on my camera before a print :)
These notifications could also be used for any sort of task that isn’t directly run from an OctoPrint
plugin, such as background processes, automated cron jobs, and much more if necessary. Of particular note is the
"persist": true property on the payload, which pins the message to the UI until it is manually dismissed. This means
that these notifications won’t just *disappear* if you don’t acknowledge them or get to see them initially.
While my camera’s battery can for quite a while, especially if I turn the screen off, it’s not big enough to last an
entire 12 hour print. Unfortunately, my camera does not support charging through the same USB port used to
control it, and would require either swapping the battery, or using a “fake battery” adapter that just provides
power from the wall instead.
I found one compatible with my camera on eBay, but it cost $20, and I decided it just wasn’t worth it for me.
If I were doing content creation, then this would be an obvious investment, but I just don’t need that.
I had quite a lot of fun setting this up, and I’m pretty happy with the results I achieved. Ultimately, I don’t
think this is actually that useful to me, as I don’t really have a use for such timelapses (other than showing
them to my friends). You might find this setup much more useful.
NOTE
Rendering the final timelapse with high-quality images is extremely expensive! I wasn’t actually able
to use Octolapse’s on-device libx264 renderer for longer prints, as my Raspberry Pi just ran out of RAM.
A better solution would be to upload the images to a local server, and invoke ffmpeg on there via ssh.
I haven’t done this as of now, but I might try it in the future.
My best workaround at the moment is to disable Octolapse rendering, and then manually pull the zipped
images from my Raspberry Pi to a separate machine and render it with ffmpeg:
Terminal window
1
$ffmpeg-y-framerate11-start_number0\
2
-i"${PREFIX}%06d.jpg"\
3
-vf"scale=1440:-2,hqdn3d=2.5:2.5:6:6"\
4
-pix_fmtyuv420p-crf20timelapse.mp4
Octolapse: Setting up beautiful 3D print timelapses